Llast week on my channel, I visited a couple of topics for which I've gotten requests, and tried to knock them out together.
One is about a simple every-day foundation routine for the face, and the other deals with that age-old challenge of properly placing flower clips into a vintage hairstyle. I tried to keep both of the videos accessible and simple enough for the beauty novice, while still appealing to those of us who have been developing our routines for years.
Foundation:
I've been playing around with my foundation routine a lot lately, mainly because my job at the Clarins counter makes it necessary to become familiar with not only foundation in general, but also different application techniques for the different formulas as well.
For now, I'm enjoying a natural-finish foundation that lasts all day and doesn't mask imperfections, but instead blurs them. You'll hear me say this a lot but I can't seem to mention it enough because I feel it's so important.
Here are the steps I've been following, sorely lacking pictures, but hopefully the embedded video will substitute for that somewhat.
Step One:
Make sure skin is cleansed, toned, and ready for product. I always use a serum and a moisturizer in the morning, because I like the radiance it gives my skin and how much easier it makes it to smooth on my foundation product. However, my Beauty Flash Balm by Clarins also provides this so it's just sort of a little bonus. That brings us to:
Step Two:
Primer. Again, I'm using the Beauty Flash Balm, but I also like to use Clinque's Moisture Surge on occasion, and if you have oily skin, a nice mattifying, silicone based primer like Lancome's La Base, works well. For drug store options, I haven't found a good base that I feel has the finish I prefer. So feel free to make some recommendations in the comments if you want to help out. I'm stumped.
Step Three:
Foundation. I usually use my fingers to warm up the product and then pat it onto my skin, focusing on getting it evenly distributed.
Step Four:
Blend. I've been using the Flawless Face Brush by Real Techniques with good results. I love a nice densely rounded brush for this purpose. There are definitely better ones than this out there...the Studio Gearl rounded foundation brush is absolutely phenomenal. But it's pricey, at 40.00
The latter brush can be used in buffing, circular motions and will provide a flawless airbrushed finish using almost any formula of liquid or cream foundation. The one I'm using in the video works better if the blending is in firm downward strokes until no brush lines are visible.
Step Five:
Conceal. Use concealer minimally. I focus mine on the inner under-eye and I do use a high coverage product and a blending brush. However, a brightening appearance without a cakey look can be achieved by using a lighter concealer formula like the Clarins Instant Light Brush On Perfector.
Step Six:
Sculpt/ Add Color. I next apply a bronzer just at my hairline and jawbone to add some color. I rarely 'contour', but you can also take the time to do this, if you like. Blush comes next, in a powder or cream, applied at the apples of the cheeks and blended toward the hairline.
Step Seven:
Set. A nice loose powder like the Dermablend Original Setting powder, works beautifully for dryer skins. For those of you who have oily skin, a pressed powder can be utilized, but just be carefully to pat it on and not rub your foundation off with the puff, brush, or sponge you use.
Here is the video, and please let me know if you have any questions about this or any other technique. I'll certainly try to assist.
Flower Placement:
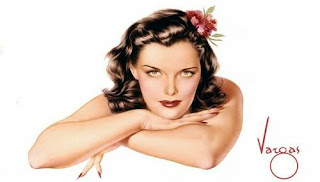
When it comes to placing flowers in vintage styles, it's hard to find a better resource than in Old Hollywood Photos or Classic Pin Up Art. Here are a few photos that can help make the job easier.
1. Small flowers can be clustered or placed on either side of a center parted style or pompadour. The latter was quite common in the 1940's for sure.
2. Mid-Sized flowers work beautifully in clusters or placed at the side of the head.
3. Large flowers work beautifully when supporting a 1940's updo or a simple tropical style, as was common in many of Alberto Vargas' paintings of the era.
Continue to play around with your own collection and see what looks most flattering for you. And here is a rambling little video on the subject as well.
To purchase flower clips, there are numerous companies to visit. I vouch for the quality of these two companies, for sure, but there are many popular options so make sure to visit the sites that your favorite pin up models also promote...
Belle Blossoms:
http://www.belleblossoms.com
Vintage Box 1947:
http://www.vintagebox1947.com
Til Next Time,
So Long Dearies!

"I believe in pink. I believe that laughing is the best calorie burner. I believe in kissing...kissing a lot. I believe that happy girls are the prettiest girls."
Audrey Hepburn
Audrey Hepburn

Subscribe to:
Post Comments (Atom)


2 comments:
I was about to say something on this topic. But now i can see that everything on this topic is very amazing and mind blowing, so i have nothing to say here. I am just going through all the topics and being appreciated. Thanks for sharing.
Thank you for sharing. You have the creativity, persistence and sufficiency to prepare and finish the work. Videos will be attractive.
Post a Comment